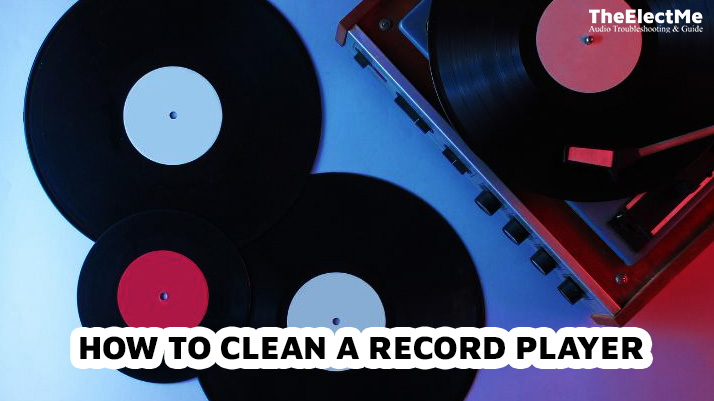
How to clean a record player without damaging it? This is a question that many vinyl enthusiasts often ask. Cleaning your record player is crucial for maintaining its performance.
But record players consist of many parts, from the needle to the cartridge and tonearm. Each part requires a specific cleaning method to avoid damaging it. That means you must have comprehensive knowledge of your record player and its components to clean it properly. However, fear not.
So start cleaning your record player by reading this guide. Let’s start with the equipment you need to clean a record player.

Which Tools And Supplies Are Required For Cleaning A Record Player?
To effectively clean your record player, you’ll need the following tools and supplies:
- Soft Microfiber Cloth: A lint-free cloth will help you remove dust and debris without scratching the surface of your record player.
- Gentle Cleaning Solution: Opt for a mild, non-abrasive cleaning solution that is safe for use on delicate surfaces. Dilute it according to the manufacturer’s instructions.
- Stylus Cleaning Brush or Soft Paintbrush: These brushes safely remove dust and particles from the delicate stylus without causing damage.
- Mild Soap and Water Solution: A gentle soap mixed with water can be used to clean the record player lid. Ensure that the solution is appropriately soapy to avoid leaving behind residue.
- Lint-Free Cloth for Turntable Platter: A separate cloth cleaning will prevent cross-contamination and ensure a thorough cleaning.

Optional Accessories for Advanced Cleaning
For those looking to take their record player cleaning routine a step further, consider the following optional accessories:
- Record Cleaning Machine: These machines are designed to deep-clean vinyl records by removing dirt, static, and surface contaminants. They can enhance the overall audio quality and longevity of your records.
- Record Cleaning Solution: Specialized record cleaning solutions effectively remove vinyl collections’ stains, fingerprints, and marks.
- Carbon Fiber Brush: This brush is great for regular maintenance. It removes static electricity and light dust from the record surface.
Gathering these essential tools and supplies will give you everything you need to begin the cleaning process. Now that you’re prepared, let’s move on to the next step – cleaning the exterior of your record player.
How To Clean A Record Player’s Exterior Parts Without Damaging It?
The exterior of your record player consists of various parts such as the turntable, tonearm, platter, and dust cover. It is important to regularly clean these components to ensure optimal sound quality and longevity of your record player.
Clean each part separately with proper methods to avoid damaging the unit.
Cleaning the Plinth and Dust Cover
To clean the plinth (the base) and dust cover of your record player, follow these steps:
- Use a soft microfiber cloth: Gently wipe the surface of the plinth and dust cover with a soft microfiber cloth. This will help remove any dust or dirt buildup.
- Apply a gentle cleaning solution: If there are stubborn stains or marks on the surface, dampen the cloth with a mild, non-abrasive cleaning solution. Avoid using abrasive cleaners that may damage the surface.
- Wipe in circular motions: Using the dampened cloth, wipe the plinth and dust cover in circular motions to ensure thorough cleaning. Take care not to apply excessive pressure, as it may cause scratches.

Cleaning the Tonearm
To clean the tonearm of your record player, follow these steps:
- Use a stylus cleaning brush or soft paintbrush: Gently brush the tonearm with a stylus cleaning brush or a soft paintbrush to remove dust or debris. Make sure to use light, sweeping motions.
- Pay attention to the stylus: Take extra care when cleaning around it, as it is a delicate component. Avoid pressing down on the stylus or applying excessive force that may damage it.
Cleaning the Record Player Lid
To clean the lid of your record player, follow these steps:
- Prepare a mild soap and water solution: Mix a small amount of mild soap with water to create a gentle cleaning solution. Ensure that the solution is appropriately soapy to prevent leaving behind residue.
- Use a soft cloth or sponge: Dip a soft cloth or sponge into the soap and water solution, then gently wipe the lid to remove any dirt or smudges.
- Dry with a lint-free cloth: After cleaning, use a separate cloth to dry the lid and remove any remaining moisture. Ensure that the lid is completely dry before closing it.
Always use a gentle touch when cleaning the exterior of your record player to avoid causing any damage. Now that you’ve successfully cleaned the exterior let’s move on to the next step – cleaning the interior components. You can also use ultrasound record cleaner machines.
How To Clean The Record Player Interior Components With the Right Instructions?
The interior parts of a record player are just as important to maintain as the exterior. Dust and debris affect your record player’s sound quality and performance over time. Follow these steps to clean the interior of your record player properly:
Cleaning the Turntable Platter
To clean the turntable platter of your record player, follow these steps:
Remove the platter: If your record player has a removable platter, follow the manufacturer’s instructions to remove it safely.
- Use a lint-free cloth and cleaning solution: Dampen a lint-free cloth with a mild cleaning solution suitable for vinyl surfaces. Avoid using excessive moisture that may damage the platter.
- Wipe away dust and residue: Gently wipe the platter in circular motions to remove any dust, dirt, or residue that may have accumulated. Pay attention to the edges and surface grooves.
- Dry thoroughly: After cleaning, ensure the platter is completely dry before placing it back onto the turntable.

Cleaning the Record Player Needle (Stylus)
Cleaning the stylus is crucial for maintaining optimal audio playback and preventing damage to your records. Here are different methods for cleaning the stylus:
Method No 1: Stylus cleaning solutions
Dedicated stylus cleaning solutions are designed to effectively remove dirt and debris from the stylus tip. Follow the instructions provided with the cleaning solution for proper usage.
Method No 2: Distilled water method
You can use distilled water if you don’t have a stylus cleaning solution. Use a damp, soft-bristled brush with distilled water to gently brush the stylus from back to front. Do not apply excessive pressure or move the brush sideways, as it may damage the stylus.
Cleaning the Record Player Belt (if applicable)
If your record player has a belt-driven mechanism, it’s important to maintain the belt’s condition. Here’s how you can clean the belt:
- Power off and unplug the record player: Before cleaning the belt, ensure the record player is turned off and opened for safety.
- Isopropyl alcohol and cotton swab: Dampen a cotton swab with isopropyl alcohol (rubbing alcohol) and gently clean the belt. This can help remove any dirt or debris affecting the belt’s performance. Allow the belt to dry completely before using the record player again.
Not all record players have a belt-driven mechanism. If your record player uses a different method for spinning the platter, skip this step.
Clean the interior of your record player for smooth operation and optimal performance.
Final Thoughts – How To Clean A Record Player?
In the past few days, I have spent most of my time on the internet to find the best ways to clean my record player. I found many articles and blogs, but most needed to be more complicated or provide more information. I am writing this guide to help you clean your record player easily.
Taking care of your record player will ensure longevity and improve sound quality. Make sure to follow these steps regularly for a better listening experience. The proper maintenance of your record player can also save you from costly repairs in the future.


